We've moved!

You will be automatically redirected to the new address. If that does not occur, visit
http://www.techimperial.com
and update your bookmarks.

Showing posts with label apple. Show all posts

Saturday, May 5, 2012

Find Large Files in Other on iTunes, Other Files in iPhone, iPad, iPod and iOS

iTunes Other on iOS device, large unknown files.

Find Other Large Files in iTunes on your iPhone, iPad, or iPod with Gawk

After upgrading your device to a new iOS or even after just downloading too many Cydia tweaks or Apps, you notice that when you plug in your device to iTunes you see a whopping amout of hard disk space being taken up as "Other" in iTunes and the only problem is: You have no way of finding out exactly what these large Other files are!

Fret no more, we will explore the world of terminal commands on a jailbroken iOS, this guide will show you how to make an automatic list of all unimportant files larger than 20 megabytes and their location in a sorted list format. Of course you can edit the 20 megabytes part to whichever number you would like.

Note: Below is the default location where the output "files.txt" will be located that you will create using this guide on iOS (your jailbroken device) and below that is the Gawk command we use during our SSH session to compile the list.

Default Directory for files.txt:
/ (root)

Gawk Command:
find / -iname "*" -ls | sort -rn -k 7.1 | gawk 'BEGIN {OFS="\t"} {if ($7 > 20971520) print $7,$11 " " $12 " " $13 " " $14 " " $15 " " $16 " " $17 " " $18 " " $19 " " $20}' > files.txt


Requirements
PuTTY (Installer) (Software)
WinSCP (Software)
OpenSSH (Cydia Package)
Core Utilities (Cydia Package)
Gawk (Cydia Package)
Jailbroken iPhone (Hardware)

    Instructions
  1. First, install PuTTY using the (putty-0.62-installer.exe) installer.
  2. Now open Cydia on your jailbroken iPhone and Queue Core Utilities, OpenSSH and Gawk. (To see them listed, make sure you are in "Developer" mode for Cydia, you can check this in: Cydia > Manage > Settings)
  3. Now you just want to install WinSCP.
  4. Next, open WinSCP and login (user: root, password: alpine) through SSH to your device (iPhone, iPad, etc, you need to enter your device's local ip address, something like 192.168.x.xx), click yes to any security warnings or key dialogs.
  5. After you connect to your device in WinSCP, goto the root directory of your device and then on the toolbar menu in WinSCP click the PuTTY icon (it looks like two terminals).
  6. You should now see the PuTTY terminal window open, it asks you to enter a password, enter alpine.
  7. Next copy the Gawk command in the red box above these instructions and right click in the terminal window to paste it, next hit enter.
  8. That command just executed and you will now find a text document named "files.txt" in the root of the device, give it about 3 minutes to finish processing the list, then download it to your computer and check out the list.
  9. The list will show you the largest items in order, you can edit the Gawk command to change what file size it looks for. (It is in bytes, so 20971520 is 20 megabytes when converted) (As a security measure, you may want to remove OpenSSH after this if you do not know how to use it)


Thursday, April 12, 2012

Change iPhone text sound, new mail sound, and UISounds (System Sounds) on iOS

Change the iPhone UI sounds with Audacity and Cyberduck.


Have you ever wanted to change the iPhone's default system sounds? Like when you check the Mail App and it downloads new mail you usually hear a ding, or perhaps the famous swoosh sound when sending a text, those are both iOS system sounds, or UISounds on your device.

This guide will show you how easy it is to make any of your audio files into a system sound you can upload to your device and use instead of the default ones.

Note: Always make sure to backup your default UISounds, either by renaming the extension to .bak or by saving them on your computer (SentMessage.caf is the swoosh sound after sending a text, new-mail.caf is the ding you hear when downloading new mail).

Default UISounds Directory:
/System/Library/Audio/UISounds/


Requirements
Audacity (Software)
Cyberduck (Software)
QuickTime Player (Only to preview the .caf audio) (Software)
Jailbroken iPhone (Hardware)

    Instructions
  1. Find the audio file you want to use to replace a default system sound.
  2. Now open the file through Audacity.
  3. Export the file as AIFF (Apple) signed 16 bit PCM type and make sure you add .caf to the end of the file name and click save. A warning box will appear, click yes.
  4. Next, open Cyberduck and SSH into your iPhone or device to the default UISounds directory listed above.
  5. Once you are there, find the sound you want to replace, such as SentMessage.caf.
  6. Rename the original (the one on the device we're replacing) SentMessage.caf to SentMessage.caf.bak to backup the original sound.
  7. Finally, rename the sound you exported in Audacity to SentMessage.caf (It's cAsE SeNsItIvE).
  8. Lastly, upload the exported file to the default UISounds directory and respring your device.
  9. Repeat these steps for any other sounds you want to replace and profit.


Sunday, February 19, 2012

Add music to your iPhone without syncing via PwnTunes

Now you don't have to sync with iTunes to add music to your iDevice!


After having many Apps installed and using more than one computer, something finally hit a nerve and I said, there has to be a solution to this whole syncing problem; my answer was PwnTunes. I don't think I have to get too technical today, but let me explain a few things first...

Lets say you have over 40 or more Apps and you remove or download more at a later date and then have over 60 Apps, lets also say you had some music on your first sync too, but since that date (maybe a month, maybe weeks) you haven't synced with iTunes. Now, it is no longer a casual sync, it is a task, because it will take you anywhere from 10 to 30 minutes to verify, sync and import the newly downloaded Apps to iTunes from your device, vice versa.

If you are a busy person and on the move quite often, you really don't have that extra time to dedicate to syncing every few days, do you? I like to go to the gym when I have spare time and I need new music, my music library is always growing and syncing can be bothersome.


PwnTunes also supports importing files such as MP3s to your iPod App by downloading them with Safari Download Manager (a cydia tweak) and moving them to the "My Music" folder with an App such as iFile. The same process can be done for importing images into the Photos App. You can even add music from another computer without having to delete your music library (like with iTunes syncing), did I mention you can export your music files too? Yeah, even your purchased songs.

Next time all you have to do is grab your iPhone, iPod Touch or iPad and just connect it to your computer with your usb cord or wirelessly through SSH, it's as simple as dragging the new music into a folder when connected and you can listen to it through the iPod App on your device next time you hit the gym, no more lengthy iTunes syncing! You will need to have "PwnTunes" installed, you can find it on Cydia in the BigBoss repository, it is developed and maintained by SpiritOfLogic. With over 800,000 downloads since conception, we have a real keeper here.

PwnTunes is the only tweak and Cydia App that can successfully import your new music files through drag and drop interface, natively from your operating system, who doesn't like the sound of that? No more checking if you synced the right Apps or that you backed up the right things, just drag and drop and open up the iPod App and you're good to go with the new music, nothing else gets changed!


The developer of this wonderful piece of software has been hard at work to make this a reality, with multiple changes, updates, and rewrites all to keep up with the way Apple implements their code. That's a lot of work for these features and it is well worth the one time purchase price of $12.99 USD.

Note: On behalf of PwnTunes, the developer and TechImperial.com would like to give away 3 free product licenses, any three creative tweets between 03/05/12 through 03/31/12 mentioning "@pwntunes #cydia" will be awarded the licenses!

Requirements
PwnTunes (App)
iPhone, iPod Touch or iPad (Hardware)


Tuesday, January 10, 2012

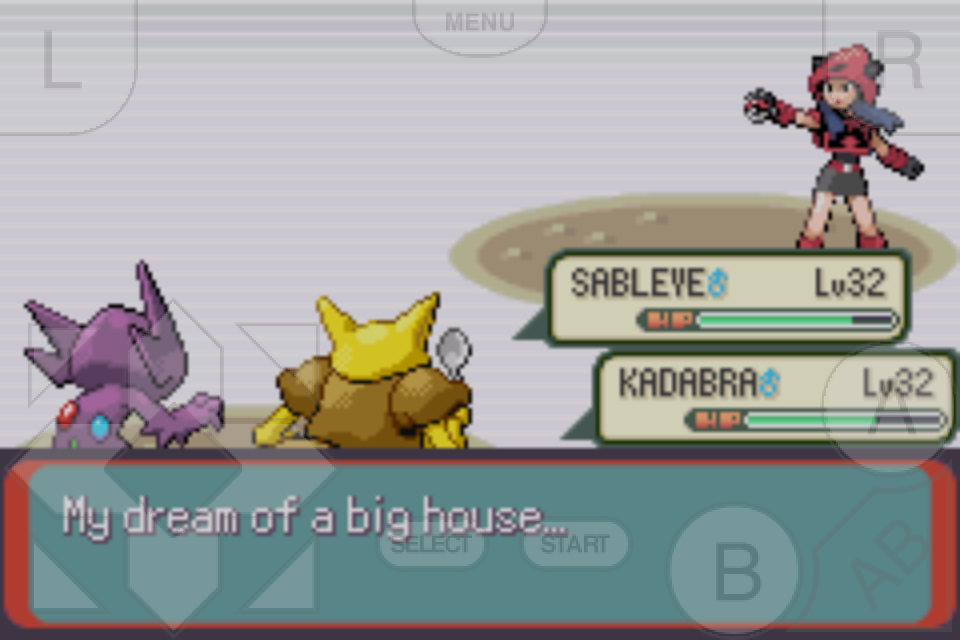
Hack Pokemon Emerald on gpSPhone 7.1.3 with Cheats


After wanting to tryout Gameboy Advanced on my iPhone, I decided the only game I'd really even bother to waste my time playing would be Pokemon. I searched for the last release of an official Pokemon for Gameboy Advanced and I soon came to the conclusion that it was Pokemon Emerald.

Now if you don't know what I'm talking about when I mention an emulator on the iPhone for Gameboy Advanced, you probably wouldn't be here. The emulator is called gpSPhone developed by ZodTTD, you should really check him out, he's a truely devoted guy and has provided the homebrew community with all sorts of ports, thanks ZodTTD!

Now I'm going to explain to you how to use a Pro Action Replay or Gameshark code with gpSPhone 7.1.3. gpSPhone has a maximum limit of 8 cheat codes per file, so make sure you only use up to eight at any given time. The format is simple, you put the description of the cheat code on one line, then the actual code on the following line. If you are using more than one cheat be sure not to put any empty lines between them.

Note: Here are the cheat codes, I've tested them and they work, some require to enter/leave an area to activate, others require a button combination input. After you use some of the warp codes to get to certain Pokemon, you should disable the code otherwise you'll keep teleporting every time you leave the area.

Cheats must be saved in a text file named the same as your rom, such as:
pokemon_emerald.gba.cht
The .cht extension is important otherwise the cheats won't load. If you saved the text file as .txt, rename the extension to .cht. Also remember, this filename is CaSe SeNsItIvE, it must match the rom file name, with the added .gba.cht of course!

Also remember to use gpSPhone 7.1.3, any other version will not work properly. The location to place the .cht file is:
/var/mobile/Media/ROMs/GBA/

Cheat codes:
999 Masterballs (PC Slot)
128898B6 EDA43037
999 Rare Candies (PC Slot)
BFF956FA 2F9EC50D
999 Full Restores (PC Slot)
20EFBA67 6E5BEFAE
Infinite Money
C051CCF6 975E8DA1
No Random Battles
2C5490D9 EB69CACB
Safari Zone
28C0A6F2 8513BE9A
Top of Sky Pillar (Rayquaza)
37A21411 E441F3EA
Faraway Island (Mew)
8DEB234A 4C8DC5EC
Navel Rock (Lugia)
842CB8A9 7F8B0149
Birth Island (Deoxys)
4A99A22B 58284D2D

Make Latias appear, must be enabled in displayed order:
Southern Island (Latias) 1
7703F025 00394020
Southern Island Latias Enabler 2
181690CB 4E53CB05

Catch anyone's Pokemon, press L+R when you see the Pokemon you want and then catch it, must be enabled in displayed order:
Catch Trainer 1
B6C5368A 08BE8FF4
Catch Trainer 2
B8D95CFE 06ED6EA1
Catch Trainer 3
E151C402 8A229A83
Catch Trainer 4
8E883EFF 92E9660D

Encounter certain Pokemon in the wilderness, enable all for the Pokemon wanted in order:
Deoxys Encounter 1
25214170 0AB256A2
Deoxys Encounter 2
FFA6733C EE552E68
Deoxys Encounter 3
2E7B7A58 D0781742
Deoxys Encounter 4
798A3738 3F94DB5D
Charizard Encounter 1
25214170 0AB256A2
Charizard Encounter 2
547D682A C32E071E
Charizard Encounter 3
2E7B7A58 D0781742
Charizard Encounter 4
D52902CA 343CF38A
Dragonite Encounter 1
25214170 0AB256A2
Dragonite Encounter 2
EF4835B3 519FF2C8
Dragonite Encounter 3
2E7B7A58 D0781742
Dragonite Encounter 4
D52902CA 343CF38A


Monday, December 26, 2011

How to update your iPhone 4 Jailbreak from iOS 4.2.1 to 4.3.3 Untethered


Well since jailbreaking isn't so simple after iOS 4.2.1, I had to make this guide to show you how to successfully jailbreak your iPhone while keeping your old baseband and using your SHSH blobs for 4.3.3.

This guide should apply to anyone who has 4.3.3 blobs saved through Cydia and can retrieve them or has them saved somewhere. Now you can jailbreak your iPhone 4 from iOS 4.2.1 to 4.3.3 Untethered using redsn0w. This will teach you how to do the update and jailbreak all while keeping your old Cydia tweaks from your previous jailbreak version.

Requirements
TinyUmbrella (Software)
iTunes (Software)
redsn0w 0.9.9b9d (Software)
Java 6 Update 30+ 32-bit (Software)
OpenBackup (App)
Stock Apple iOS 4.3.3 for iPhone 4 GSM 8J2 (Software)

    Instructions
  1. First, make sure you backup your iPhone through iTunes.
  2. Now, backup all your Cydia tweaks with OpenBackup. (You're going to have to SSH into your device to grab the backup it made and save it on the computer, you can find OpenBackup at repo.modyouri.com)
  3. Get your SHSH Blobs using TinyUmbrella make sure the option to get them from Cydia is checked under the "Advanced" tab.
  4. Download the stock firmware from Apple for iPhone 4 GSM iOS 4.3.3 8J2.
  5. Next, run redsn0w 0.9.9b9d, select "Extras", now select "SHSH blobs" and then select "Stitch".
  6. You should now see two buttons, click on "IPSW" and when explorer pops up, find the stock Apple firmware you just downloaded, select it.
  7. Now click "Local" and find your SHSH blobs you downloaded earlier through TinyUmbrella and select them, then click next and allow it to stitch the stock firmware.
  8. Now close redsn0w and open it again, select "Extras" and click on "Custom IPSW", when explorer opens up find the IPSW you just stitched, it should be on your desktop. (Not the stock one)
  9.  After it's done processing the file, you should have a new firmware named something like "NO_BB_4205467635188_iPhone3,1_4.3.3_8J2_Restore.ipsw".
  10. Now in redsn0w place your device in "Pwned DFU" mode.
  11. In iTunes restore your device, hold shift and click on "Restore" so you can select the custom IPSW. (The file you stitched with your blobs and removed the baseband data from, also make sure that in TinyUmbrella you selected Cydia as your host before doing this step)
  12. After that is done, do not restore the iPhone's backed-up data, iTunes will ask you to do so, do not do that yet, close iTunes.
  13. Next, using redsn0w select "Extras", then click "Select IPSW", select the stock Apple firmware here. (Not the modified one, the stock, it will let you know it identified it)
  14. Now click "< Back" and select "Jailbreak", select your options the ones you want installed. (Cydia is important, I wouldn't recommend any of the others)
  15. Now restore your Cydia tweaks with OpenBackup. (This will take a while, make sure to place the backup from completing the second step in the original folder through SSH located at /var/mobile/Library/Preferences/OpenBackupFiles)
  16. The final step is to Restore your backup from iTunes now, sync through iTunes, finally restore the same backup through iTunes again.
  17. Reboot and you have successfully upgraded your jailbreak from iOS 4.2.1 to iOS 4.3.3 on your iPhone 4 GSM, while preserving the baseband and having your SHSH blobs.


Monday, December 12, 2011

Free iPhone WiFi Calls

How to setup free Wifi Calling on your iPhone with Vonage & Google Voice

Free iPhone Calls through Wifi with Vonage® Mobile and Google Voice™ apps.

Ever wondered how to make and receive free calls on your iPhone? I did. I wondered about how I could possibly get away with making free WiFi calls and receiving them. I found a nice solution to my question and my curiosity, the following will explain how this works and what you must do to be able to make free WiFi calls.

There have been many methods brewed up by random people online here and there in the past, such as using a Gizmo5™ account or more advanced SIP numbers. Those methods are now outdated, Google™ bought Gizmo5™, you can no longer register for a Gizmo5™ account. The SIP numbers come with a price tag now and it just doesn't feel right.

This new method uses the Vonage™ and Google Voice™ apps to make and receive free WiFi calls. This only works in the United States, since Google Voice™ is only available to US Residents, Vonage™ only allows free WiFi calls to numbers in the US as well.

Requirements
iPhone (Hardware)
Computer Headset (Hardware)
Vonage Mobile (App)
Google Voice (App)
Google Chrome (Software)
Google Voice & Video Chat plug-in (Software)
Gmail account (Service)
Google Voice account (Service)

    Instructions
  1. Make sure you have the requirements installed, setup and ready to use, also plug your headset into the computer.
  2. From this point on, you should only be using the Chrome browser to do any Google related activities.
  3. Login to your Google Voice account, go to settings and enable "Google Chat" as a forwarding phone for calls. (If you do not see Google Chat followed by your Gmail e-mail, login to Gmail and place a brief call to your number, then refresh the Google Voice page, it should now be listed) 1
  4. Now make sure you have an open Gmail page with your account logged in. Make sure your settings resemble the ones on for this step's image. 2
  5. Open Vonage Mobile on your iPhone and setup an account using your Google Voice number as the phone you will use to verify the account.
  6. Vonage Mobile will place an automated call to your Google Voice number now and will require you to input a few digits to verify the number is yours, make sure your speakers are on and your Gmail account is open and ready for a call.
  7. Now that your Vonage Mobile account is verified and registered, you will be given a pop-up to purchase a Vonage Rate Plan, click Ok and exit the link it opens. (You do not need to purchase anything to make calls within the United States)
  8. Make sure you're on a WiFi network and place a call using Vonage Mobile, the party you are calling should see your Google Voice number as the caller I.D.
  9. You can now use the Google Voice app on your iPhone to send and recieve texts, get voicemails, view your Google contacts and check call logs, all through WiFi. (You must use Vonage Mobile to place calls through WiFi as the Google Voice app is not a VOIP client)
  10. Feel free to setup your Google Voice account to ring your iPhone's actual number in case you want to receive live calls. (Otherwise you'll just have to check your voicemails or missed calls through the Google Voice app)
  11. You have successfully configured your iPhone to place free WiFi calls and somewhat incoming calls, plus completely free texting and free voicemail with additional features all for free.


Sunday, November 13, 2011

Fix FieldTest, iOS Diagnostics, AdSheet and others from showing up on Springboard, iPhone & iOS

Have you ever installed something through Installous 4 or Cydia, afterward coming back to Springboard to see some blank icons with labels like FieldTest, iOS Diagnostics, AdSheet, Setup, Intellicontainer or others which are never supposed to be showing in the first place?

Screen-shot of the libhide bug.

This issue is known and it's a bug because it happens after installing any app through your iPhone, this might apply to iPod Touch but, I'm only covering the iPhone in detail here.

The cause for this problem comes from a dylib named "libhide", from the author's description it is a library to hide icons. I do not know which version of libhide you have or had in the past so you are going to be doing some manual work here if you are to remove this bug.

    Solution
  1. Close all your current running apps.
  2. Open SBSettings, click "More", scroll down and open "Poof", make sure that all your icons are toggled on. 1, 2, 3.
  3. Now you need to install the latest version of libhide, as of 11/13/2011 the latest libhide version is 2.1.
  4. You can either download it from here and install it through iFile by clicking on the .deb file and selecting install or you can open Cydia and add http://apt.thebigboss.org as a source then install it after searching for it. (If you have any trouble finding it on Cydia make sure you have Developer enabled by going to Manage > Settings > Select Developer and Click Done)
  5. Open SBSettings and click "More", "Mobile Substrate Addons" make sure libhide is toggled on.
  6. Now that you installed the latest version of libhide and did the above, you must hard reboot your idevice.
  7. Upon restarting and unlocking you should now open SBSettings and click "More", "Mobile Substrate Addons" and toggle libhide off. (You can leave it on if you'd like, I had no need for it on) 4.
  8. If you toggled it off, hard reset your device once more.
  9. Upon restarting and unlocking your device, this time you should open Installous or Cydia and install an app, this should have fixed your problem and you'll no longer see those pesky icons on Springboard again.

Note: It's been reported that the icons will still appear on some devices for unknown reasons, if this is the case with yours, toggle libhide off in Mobile Substrate Addons or remove it through Cydia altogether.


iPod App Crashes, iPhone & iPod

iPod
iPod Logo Copyright © 2011 Apple Inc.


The Issue
Some mp3s synced through iTunes that did not originate from the iTunes store causes iPod.app to crash within iOS 4+, usually every time you hit "Shuffle" within the iPod App, it will crash.

I too have been having this issue, I use something called Replay Media Catcher 4 when I listen to premium streaming music or podcasts, it does a great job catching streams. Although, it tags some files, I am assuming that some of the tagging corrupts the database in iTunes so that my iPhone cannot play some of the tagged files (I know it is the tagging or default encoding of the file because I have tested it by converting files from mp3 to m4a and the latter doesn't crash the iPod App).

You could just convert the files to m4a or whichever format you like that your device supports playback of, but that is a lengthy and ridiculous process and will inevitability lead to audio quality loss.

    Solution
  1. Disable spotlight search for audio files, including podcasts, etc.
  2. Browse to /private/var/mobile/Media/
  3. You should see "com.apple.dbaccess.lock", delete that file and if you see anything such as iTunesDB or similar, delete that as well, do not delete anything with "lock" or "sync" in the name as these are important files.
  4. In the same directory there is a directory named "iTunes_Control" go into that directory.
  5. Ignore the "Music", "Ringtones" directories. (Do not modify their contents)
  6. This is where you can figure out the rest, there is an "iTunes" and "Artwork" directory.
  7. Go into "Artwork" and delete all files and folders within it.
  8. Go back and enter "iTunes", you'll see plists, delete whichever one has anything to do with databases.
  9. Enter "iTunes Library.itlp" and delete anything that has to do with iTunes/Music databases here too. (Note "Library.itdb" is ok to have)
  10. There is another directory within this one called "DBTemp", delete whatever is in it.
  11. Hard Reboot.
  12. Profit. (If you re-sync, there's nothing to worry about)