We've moved!

You will be automatically redirected to the new address. If that does not occur, visit
http://www.techimperial.com
and update your bookmarks.

Tuesday, January 10, 2012

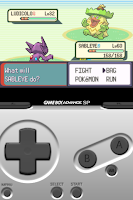
Hack Pokemon Emerald on gpSPhone 7.1.3 with Cheats


After wanting to tryout Gameboy Advanced on my iPhone, I decided the only game I'd really even bother to waste my time playing would be Pokemon. I searched for the last release of an official Pokemon for Gameboy Advanced and I soon came to the conclusion that it was Pokemon Emerald.

Now if you don't know what I'm talking about when I mention an emulator on the iPhone for Gameboy Advanced, you probably wouldn't be here. The emulator is called gpSPhone developed by ZodTTD, you should really check him out, he's a truely devoted guy and has provided the homebrew community with all sorts of ports, thanks ZodTTD!

Now I'm going to explain to you how to use a Pro Action Replay or Gameshark code with gpSPhone 7.1.3. gpSPhone has a maximum limit of 8 cheat codes per file, so make sure you only use up to eight at any given time. The format is simple, you put the description of the cheat code on one line, then the actual code on the following line. If you are using more than one cheat be sure not to put any empty lines between them.

Note: Here are the cheat codes, I've tested them and they work, some require to enter/leave an area to activate, others require a button combination input. After you use some of the warp codes to get to certain Pokemon, you should disable the code otherwise you'll keep teleporting every time you leave the area.

Cheats must be saved in a text file named the same as your rom, such as:
pokemon_emerald.gba.cht
The .cht extension is important otherwise the cheats won't load. If you saved the text file as .txt, rename the extension to .cht. Also remember, this filename is CaSe SeNsItIvE, it must match the rom file name, with the added .gba.cht of course!

Also remember to use gpSPhone 7.1.3, any other version will not work properly. The location to place the .cht file is:
/var/mobile/Media/ROMs/GBA/

Cheat codes:
999 Masterballs (PC Slot)
128898B6 EDA43037
999 Rare Candies (PC Slot)
BFF956FA 2F9EC50D
999 Full Restores (PC Slot)
20EFBA67 6E5BEFAE
Infinite Money
C051CCF6 975E8DA1
No Random Battles
2C5490D9 EB69CACB
Safari Zone
28C0A6F2 8513BE9A
Top of Sky Pillar (Rayquaza)
37A21411 E441F3EA
Faraway Island (Mew)
8DEB234A 4C8DC5EC
Navel Rock (Lugia)
842CB8A9 7F8B0149
Birth Island (Deoxys)
4A99A22B 58284D2D

Make Latias appear, must be enabled in displayed order:
Southern Island (Latias) 1
7703F025 00394020
Southern Island Latias Enabler 2
181690CB 4E53CB05

Catch anyone's Pokemon, press L+R when you see the Pokemon you want and then catch it, must be enabled in displayed order:
Catch Trainer 1
B6C5368A 08BE8FF4
Catch Trainer 2
B8D95CFE 06ED6EA1
Catch Trainer 3
E151C402 8A229A83
Catch Trainer 4
8E883EFF 92E9660D

Encounter certain Pokemon in the wilderness, enable all for the Pokemon wanted in order:
Deoxys Encounter 1
25214170 0AB256A2
Deoxys Encounter 2
FFA6733C EE552E68
Deoxys Encounter 3
2E7B7A58 D0781742
Deoxys Encounter 4
798A3738 3F94DB5D
Charizard Encounter 1
25214170 0AB256A2
Charizard Encounter 2
547D682A C32E071E
Charizard Encounter 3
2E7B7A58 D0781742
Charizard Encounter 4
D52902CA 343CF38A
Dragonite Encounter 1
25214170 0AB256A2
Dragonite Encounter 2
EF4835B3 519FF2C8
Dragonite Encounter 3
2E7B7A58 D0781742
Dragonite Encounter 4
D52902CA 343CF38A


Saturday, January 7, 2012

NDAA Activists Arrested in Grand Central Terminal


Yesterday, January 6th 2012, there was a protest in Grand Central Terminal against the National Defense Authorization Act which contains an amendment authorizing the military to detain American citizens indefinitely without due process, current US president Barack Hussein Obama signed this bill, it is written to allow the detention of US citizens domestically and abroad as well as foreigners, without trial.

In the video you can see protesters shouting about the NDAA bill and attempting to inform commuters at Grand Central Terminal, an educational move on their behalf. The first person to be arrested for speaking out was Lauren Digioia, the police drag her away from the scene shoving everyone in their way, everyone goes silent, not sure of what they should do next...

Shortly after Lauren was removed, a man named Zach Kamel, raised his voice, along with other protesters, to express their outrage against the arrest of Lauren for exercising her first amendment right, quickly after he starts to speak out about what has just occurred he too is arrested and taken away from the scene. I believe this is what you would call a police state, where you cannot speak up or speak out about certain policies in large numbers within a group, the leaders and the voices of the people who have the courage to speak out in public are targeted and shut up by force.

I understand the need to keep certain military affairs under wraps, but this is public knowledge which is law, why would these folks be persecuted for speaking about it?

America is speaking out and this is how they are greeted, who's next?


Monday, December 26, 2011

How to update your iPhone 4 Jailbreak from iOS 4.2.1 to 4.3.3 Untethered


Well since jailbreaking isn't so simple after iOS 4.2.1, I had to make this guide to show you how to successfully jailbreak your iPhone while keeping your old baseband and using your SHSH blobs for 4.3.3.

This guide should apply to anyone who has 4.3.3 blobs saved through Cydia and can retrieve them or has them saved somewhere. Now you can jailbreak your iPhone 4 from iOS 4.2.1 to 4.3.3 Untethered using redsn0w. This will teach you how to do the update and jailbreak all while keeping your old Cydia tweaks from your previous jailbreak version.

Requirements
TinyUmbrella (Software)
iTunes (Software)
redsn0w 0.9.9b9d (Software)
Java 6 Update 30+ 32-bit (Software)
OpenBackup (App)
Stock Apple iOS 4.3.3 for iPhone 4 GSM 8J2 (Software)

    Instructions
  1. First, make sure you backup your iPhone through iTunes.
  2. Now, backup all your Cydia tweaks with OpenBackup. (You're going to have to SSH into your device to grab the backup it made and save it on the computer, you can find OpenBackup at repo.modyouri.com)
  3. Get your SHSH Blobs using TinyUmbrella make sure the option to get them from Cydia is checked under the "Advanced" tab.
  4. Download the stock firmware from Apple for iPhone 4 GSM iOS 4.3.3 8J2.
  5. Next, run redsn0w 0.9.9b9d, select "Extras", now select "SHSH blobs" and then select "Stitch".
  6. You should now see two buttons, click on "IPSW" and when explorer pops up, find the stock Apple firmware you just downloaded, select it.
  7. Now click "Local" and find your SHSH blobs you downloaded earlier through TinyUmbrella and select them, then click next and allow it to stitch the stock firmware.
  8. Now close redsn0w and open it again, select "Extras" and click on "Custom IPSW", when explorer opens up find the IPSW you just stitched, it should be on your desktop. (Not the stock one)
  9.  After it's done processing the file, you should have a new firmware named something like "NO_BB_4205467635188_iPhone3,1_4.3.3_8J2_Restore.ipsw".
  10. Now in redsn0w place your device in "Pwned DFU" mode.
  11. In iTunes restore your device, hold shift and click on "Restore" so you can select the custom IPSW. (The file you stitched with your blobs and removed the baseband data from, also make sure that in TinyUmbrella you selected Cydia as your host before doing this step)
  12. After that is done, do not restore the iPhone's backed-up data, iTunes will ask you to do so, do not do that yet, close iTunes.
  13. Next, using redsn0w select "Extras", then click "Select IPSW", select the stock Apple firmware here. (Not the modified one, the stock, it will let you know it identified it)
  14. Now click "< Back" and select "Jailbreak", select your options the ones you want installed. (Cydia is important, I wouldn't recommend any of the others)
  15. Now restore your Cydia tweaks with OpenBackup. (This will take a while, make sure to place the backup from completing the second step in the original folder through SSH located at /var/mobile/Library/Preferences/OpenBackupFiles)
  16. The final step is to Restore your backup from iTunes now, sync through iTunes, finally restore the same backup through iTunes again.
  17. Reboot and you have successfully upgraded your jailbreak from iOS 4.2.1 to iOS 4.3.3 on your iPhone 4 GSM, while preserving the baseband and having your SHSH blobs.


Tuesday, December 20, 2011

How to Enable a Bluetooth Headset on your PC

How to get a mobile Bluetooth Headset to work on your computer even if it's not supported.

Enable Bluetooth capability on your computer.

Have you ordered an expensive Bluetooth Headset only to realize it wasn't going to work on your device? Well I did, I purchased a Bluetooth Jabra Sport headset, it was $99. When the headset arrived I used it for a while outdoors and at the gym, it came time where I wanted to use Skype to call a friend in England, but the problem was my Bluetooth headset that I just bought for a pretty penny did not have drivers for Windows. So I decided to find a way to fix this issue so that I can use my headset on my pc without a problem.

The solution I came across was a simple one, all you need to do is download a Bluetooth driver stack by Toshiba, they have discontinued the download for end users for an unknown reason, but you are still able to obtain it elsewhere on the Internet. This one is pretty self explanatory, it will work on 32bit or 64bit systems, the only catch is you need a Bluetooth adapter chip installed on your computer or laptop. Make sure to download the correct version, the last version available is 8.00.12.

Requirements
Toshiba Bluetooth Stack (Software)
Bluetooth Headset (Hardware)
Bluetooth Adapter (Hardware)

Monday, December 12, 2011

Free iPhone WiFi Calls

How to setup free Wifi Calling on your iPhone with Vonage & Google Voice

Free iPhone Calls through Wifi with Vonage® Mobile and Google Voice™ apps.

Ever wondered how to make and receive free calls on your iPhone? I did. I wondered about how I could possibly get away with making free WiFi calls and receiving them. I found a nice solution to my question and my curiosity, the following will explain how this works and what you must do to be able to make free WiFi calls.

There have been many methods brewed up by random people online here and there in the past, such as using a Gizmo5™ account or more advanced SIP numbers. Those methods are now outdated, Google™ bought Gizmo5™, you can no longer register for a Gizmo5™ account. The SIP numbers come with a price tag now and it just doesn't feel right.

This new method uses the Vonage™ and Google Voice™ apps to make and receive free WiFi calls. This only works in the United States, since Google Voice™ is only available to US Residents, Vonage™ only allows free WiFi calls to numbers in the US as well.

Requirements
iPhone (Hardware)
Computer Headset (Hardware)
Vonage Mobile (App)
Google Voice (App)
Google Chrome (Software)
Google Voice & Video Chat plug-in (Software)
Gmail account (Service)
Google Voice account (Service)

    Instructions
  1. Make sure you have the requirements installed, setup and ready to use, also plug your headset into the computer.
  2. From this point on, you should only be using the Chrome browser to do any Google related activities.
  3. Login to your Google Voice account, go to settings and enable "Google Chat" as a forwarding phone for calls. (If you do not see Google Chat followed by your Gmail e-mail, login to Gmail and place a brief call to your number, then refresh the Google Voice page, it should now be listed) 1
  4. Now make sure you have an open Gmail page with your account logged in. Make sure your settings resemble the ones on for this step's image. 2
  5. Open Vonage Mobile on your iPhone and setup an account using your Google Voice number as the phone you will use to verify the account.
  6. Vonage Mobile will place an automated call to your Google Voice number now and will require you to input a few digits to verify the number is yours, make sure your speakers are on and your Gmail account is open and ready for a call.
  7. Now that your Vonage Mobile account is verified and registered, you will be given a pop-up to purchase a Vonage Rate Plan, click Ok and exit the link it opens. (You do not need to purchase anything to make calls within the United States)
  8. Make sure you're on a WiFi network and place a call using Vonage Mobile, the party you are calling should see your Google Voice number as the caller I.D.
  9. You can now use the Google Voice app on your iPhone to send and recieve texts, get voicemails, view your Google contacts and check call logs, all through WiFi. (You must use Vonage Mobile to place calls through WiFi as the Google Voice app is not a VOIP client)
  10. Feel free to setup your Google Voice account to ring your iPhone's actual number in case you want to receive live calls. (Otherwise you'll just have to check your voicemails or missed calls through the Google Voice app)
  11. You have successfully configured your iPhone to place free WiFi calls and somewhat incoming calls, plus completely free texting and free voicemail with additional features all for free.


Friday, December 9, 2011

Convert PAL to NTSC

Patching a PAL DVD to NTSC on Windows 7

Television encoding systems by nation.

Have you ever wondered how you could convert a PAL DVD to an NTSC version? The reason you are most likely interested in accomplishing this is because you either have a DVD or a Disc Image file created for another region other than your own, such as Europe or China if you're from North America. Following these steps will teach you how to patch a PAL DVD (or image file) to NTSC and burn it.

This guide will only work for DVD Movies, you must have either the actual DVD disc or a disc image file (.ISO, .IMG, .UDF, etc). You may also want to note that this process does not mean you will have to re-encode the actual movie, it is just a patch that fools the DVD player into thinking it is NTSC in order to play it, this fix should work with a majority of DVD players in the market today.

Did you know? DVD region codes are a digital-rights management technique designed to allow film distributors to control aspects of a release, including content, release date, and price, according to the region. DVD video discs may be encoded with a region code restricting the area of the world in which they can be played.

Requirements
Slysoft Virtual CloneDrive (Freeware)
IfoEdit 0.971 (Freeware)
Windows Disc Image Burner (Windows 7 feature)

    Instructions
  1. Mount your PAL disc into your DVD drive, if you do not have a disc, mount the disc image file with Virtual CloneDrive. (If the movie automatically plays, close it)
  2. Open "Computer" from the Start Menu and right click on the device which has the DVD mounted and select "Open". 1
  3. You will now see a "VIDEO_TS" folder, copy this folder onto your desktop. 2, 3
  4. Run IfoEdit, select "Open" on the bottom left side of the window.
  5. Browse to your VIDEO_TS folder and select the "VIDEO_TS.IFO" file. (If you have multiple VIDEO_TS_XX.IFO files, you will have to do this for all of them each, individually) 4
  6. You will now see the file you selected, click the first line in the top area. (The one with your username) 5
  7. Now look towards the bottom area, you will see references to PAL, double click the line with the first reference to PAL.
  8. A "Video attributes" window will appear, switch PAL to NTSC first, then uncheck Automatic Pan&Scan and check Automatic Letterbox, now make sure the resolution is "720 x 480", then click "OK". 6
  9. Continue scrolling the bottom area, doing the above step for every line which references "PAL".
  10. Afterward click "Region Free" and click "OK". 7
  11. Click "Save", you should be prompted to save the BUP file as well, do so. (After this you can either close and re-open IfoEdit and reload the "VIDEO_TS.IFO" file to verify changes or not)
  12. Now click "Disc Image" near the bottom right area of the window, click "Create Image" after choosing a location to save it to. 8
  13. After the image file has been generated, right click the .img file and Open with "Windows Disc Image Burner", then select "Burn", make sure you have a DVD+R Burner and DVD+R disc to burn the image onto. 9
  14. You've completed the patching process and burned an NTSC version of your disc, feel free to watch it on your DVD Player now.


Sunday, November 20, 2011

iAP Cracker: Free In-App Purchases

Free In-App Purchases on jail-broken devices.

In-App Purchases are now free for those with jail-broken devices, ever wondered how you could beat a game that had In-App Purchases? Maybe you didn't want to waste your hard earned money on extras, or you just didn't want to spend an eternity trying to come up with gold coins. Now there's actually an easy solution to fix your problem; it enables you to progress in any game or app that allows you to do In-App Purchases. (Not every app, but a majority of them, here's a list, you can try apps not on the list, many of them may work)

Note: If you're looking to test this on some randoms apps, a simple Google™ search should do the trick, just click here. This simple search uses Google™ search operators, here's what it looks like:
site:"itunes.apple.com" intitle:"App Store" intext:"Top In-App Purchases"

Don't let the name fool you, this is not a crack or anything of the sort, it's a Mobile Substrate Addon (11kb), it was written and developed by urus, it's called iAP Cracker.

The latest version is 0.5-1 (it works on iOS 4 & 5), there's links below where you may be able to find the .deb file and install it through iFile or however you choose to. You can also search for it on Cydia, it should be in the Banned iPhone repository. Now you can buy all the coins in Dark Meadow™ or Unlock the Mighty Eagle in Angry Birds™. This also makes Nadis Lai's Game Mod add-ons useless for a majority of games which implement IAP, iAP Cracker is free, his stuff isn't.